You may have heard about Facebook Instant Articles? Also, wanting to add Facebook Instant Articles on your Blogger BlogSpot site. In this article, we will show you how to setup Facebook instant articles in blogger with step by step instructions. We will also cover pros and cons of using Facebook Instant articles to see whether it is worthy to be considered or not.

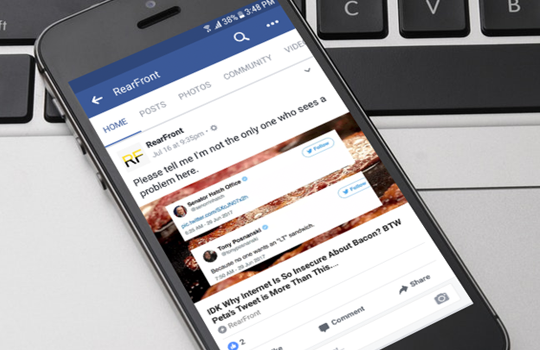
Many popular websites are already using Facebook instant articles to distribute their content which includes RearFront, TechCrunch, Mashable and many other. To identify instant articles on Facebook, you can look for a lightning bolt icon as shown in the picture below:
Pros of Using Facebook Instant Articles:
Cons of Using Facebook Instant Articles:
Going through the pros and cons thoroughly, it may not be a right decision for you to implement Facebook instant articles especially if you are running a business oriented website. However, news or multimedia niche websites can surely benefit from this wonderful service.
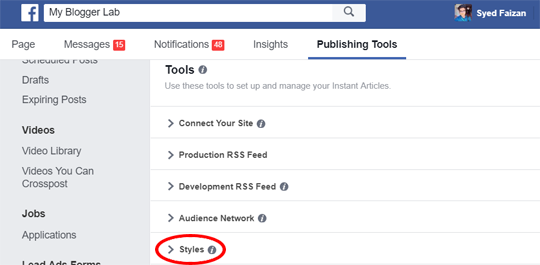
Scroll down to the Tools section and click on "Styles" to expend more options.
Click on the "default" to customize it or click on "add styles" to create a complete design of your own.
Click on "Logo" and upload a transparent logo of your website which should be in PNG format. The minimum logo dimensions requirement is 690px in width and 132px in height.
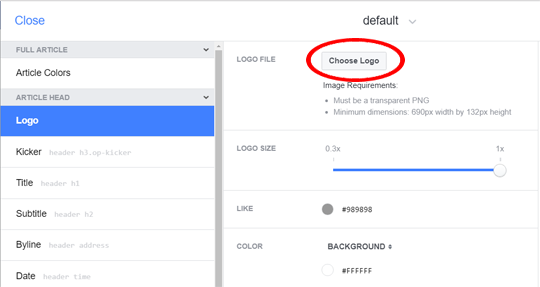
After uploading the logo, click on Save and then click on Close.

What are Facebook Instant Articles?
Instant Articles powered by Facebook is a mobile publishing tool that allows publishers to load their articles ten times faster than a normal web page. Instant articles use Facebook App and customize web templates to maximize the load time.Many popular websites are already using Facebook instant articles to distribute their content which includes RearFront, TechCrunch, Mashable and many other. To identify instant articles on Facebook, you can look for a lightning bolt icon as shown in the picture below:

Pros and Cons of Facebook Instant Articles
Following are the few pros and cons of using Facebook instant articles, please go through them before you setup instant articles on blogger.Pros of Using Facebook Instant Articles:
- It increases the load time dramatically.
- Most of the people abundant a website if it takes a while to load, Facebook instant articles will improve your traffic as it takes almost micro seconds to load your content.
- Because of better user experience, it is more likely that users will share your content meaning greater social signals.
- Monetizing your content is another big reason to choose Facebook Instant articles.
- The best thing, you can use Instant articles by Facebook for FREE.
Cons of Using Facebook Instant Articles:
- If you are using any third-party advertisements services like Facebook, Infolinks or BuySellAds, then you may witness a drop in your revenue because Facebook limits the number of ads delivered through instant articles.
- Facebook might restrict the number images and videos on your instant articles. It is done to increase the load time of your content.
- If you are using a widget within your article, then it will no longer appear on your instant article
- The sidebar of your website will not appear on your instant article. It means any widgets, advertisements or information in your sidebar will not reach the audience.
Going through the pros and cons thoroughly, it may not be a right decision for you to implement Facebook instant articles especially if you are running a business oriented website. However, news or multimedia niche websites can surely benefit from this wonderful service.
How to Setup Facebook Instant Articles in Blogger
Step#1: Signup for Facebook Instant Articles
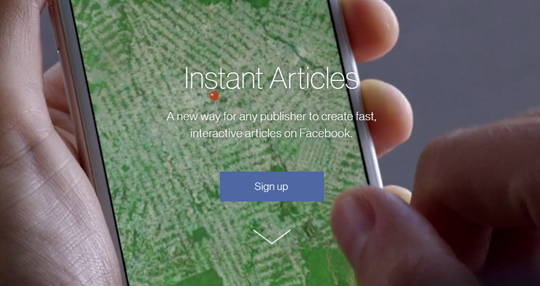
The very first thing you need to do is to visit Facebook Instant Articles page and click on the signup button to get the process started.

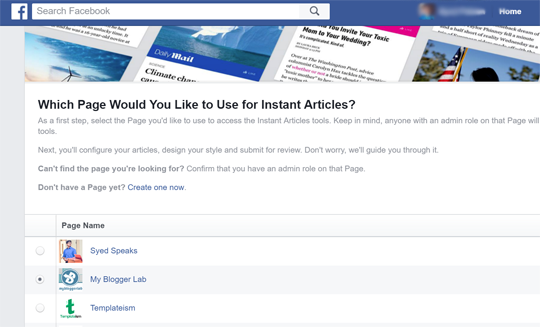
Now you will be asked to select one of your Facebook pages that you would like to use for your instant articles.

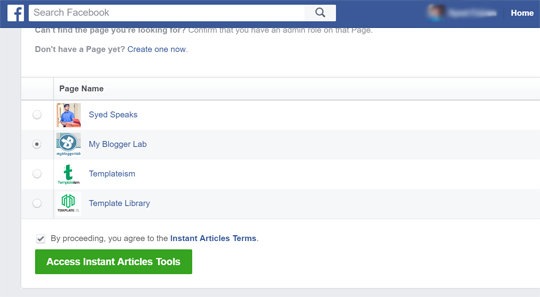
After selecting the page of your choice, check the box to agree to the terms and conditions of using Instant articles. After agreeing to terms, click on ‘Access Instant Articles Tools’ button.

It will take you to your page that you selected in the previous step. You will notice that your publishing tools now has Facebook instant articles section.
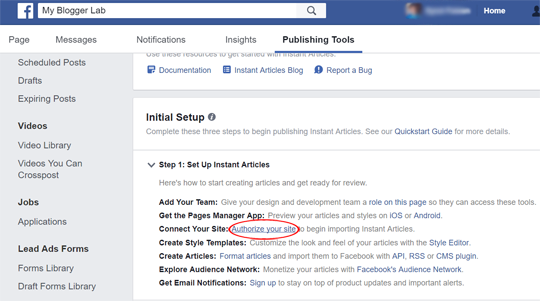
Now you need to authorize your website to be able to import instant articles. In other words, you have to prove the ownership of your site.

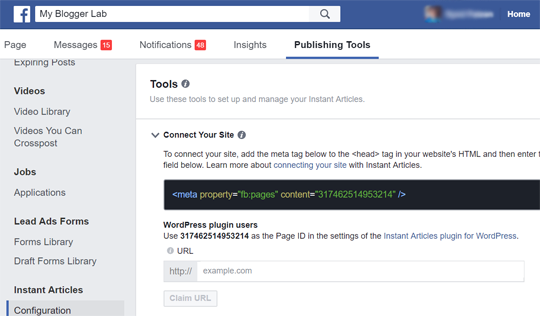
To begin the authentication process, click on "Authorize your site" link, and Facebook will scroll you to the Tools section where you will see a small code snippet.

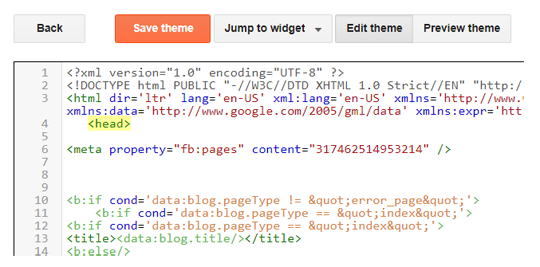
You need to copy this code and paste after the <head> section of your Blogger Theme.
Go to Blogger >> Theme >> Edit HTML >> Search for <head> and just below it paste the code.

After adding the code to your Blogger Theme press Save to store changes.
Once you have successfully added the meta code to your website, go back to the publisher tools section of your Facebook Page.
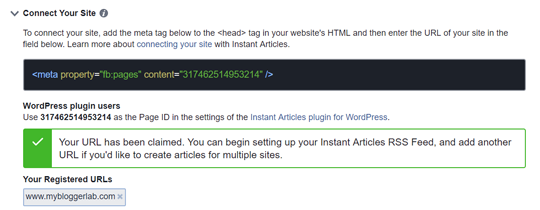
You need to enter the URL of your site. After entering click on "Claim URL" to finish the authentication process.
If you have followed the instructions correctly, you will see a message that says "Your URL has been claimed".

The next step is to add your website's RSS Feed link to Facebook Instant Articles, so it can automatically fetch information about your articles when they are published on your site.
Luckily, Blogger provides a robust RSS feeds page by default for each blog that you create. Also Make sure your's RSS Feeds are turned on your Blogger site.
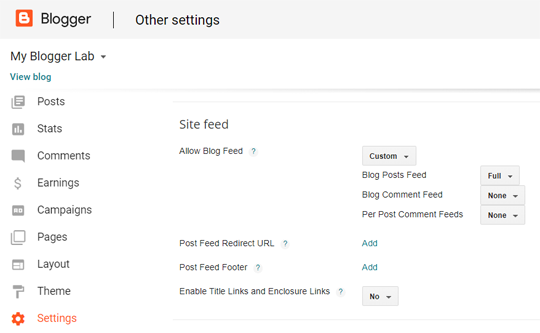
Another thing you will need to make sure that your "Blog Posts Feed" are set to Full. Go to Blogger Dashboard >> Your Blog >> Settings >> Others >> Site feed >>. Make sure "Allow Blog Feed" is either set to Full or if you want custom settings you can follow as shown in the screenshot below:

If you are already using a setting that already allows full blog posts feeds then there is no need to make any changes in this step.
You can access your RSS feeds page by adding /feeds/posts/default?alt=rss after your site's URL i.e.: http://www.mybloggerlab.com/feeds/posts/default?alt=rss
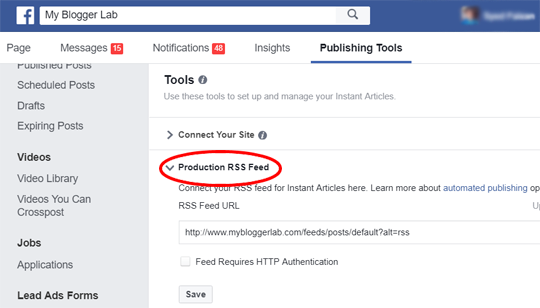
Copy your RSS feed URL and switch back to your page's Publishing Tools >> Instant Article. Scroll down to Tools section and select "Production RSS Feed" to expand more options.
Paste your RSS feed URL and click on the "Save" button. Now the page will be refreshed, and you will see a message that your feed was successfully added if you followed the instructions correctly.

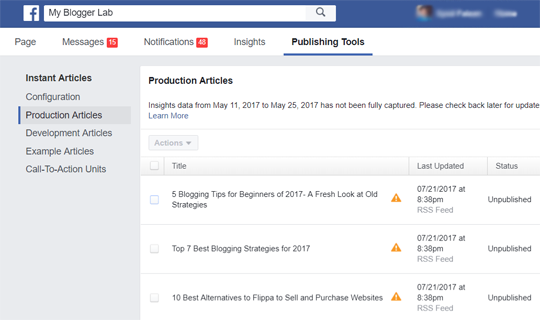
Visit your Facebook page and click on Publishing Tools. From your left hand menu, click on ‘Production Articles’ under Instant Articles. If you have followed the steps correctly then you will be able to see a list of articles that are published on your website.

Step#2: Adding Logo to Your Instant Articles
Go to your Facebook page and click on Publishing Tools. From your left hand menu, click on ‘Configuration’ under Instant Articles.Scroll down to the Tools section and click on "Styles" to expend more options.

Click on the "default" to customize it or click on "add styles" to create a complete design of your own.
Click on "Logo" and upload a transparent logo of your website which should be in PNG format. The minimum logo dimensions requirement is 690px in width and 132px in height.

There are many options for customization, and you can play with it and get a unique look for your instant articles.
After uploading the logo, click on Save and then click on Close.
Step#3: Submit Your Instant Articles for Review:
Before you can submit your Instant Articles for review, make sure that there are at least 5 Instant articles in your Production library. Once you are sure that there are at least five articles, then you are good to submit your Instant Articles for review.
Go to your Facebook page and click on Publishing Tools. From your left menu, click on ‘Configuration’ under Instant Articles.
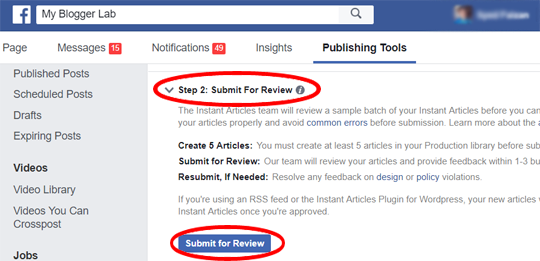
In Initial Setup section, look for "Step 2: Submit For Review"

If there are no auto-generated errors you will be able to submit your Instant Articles for review. Go ahead and click on "Submit for Review" to send your feeds for reviewing. It will normally take 1-3 business days to get a reply from Facebook review team.
Once the Facebook review team fully approves your Instant Articles, you will be able to move to "Step 3: Start Publishing Instant Articles" and start publishing your Instant Articles.

Comments
Post a Comment